

Vampy Lips Without the Drama: How to Make Bold Color Wearable Every Day
Look, we get it. You see that gorgeous deep plum, wine, or burgundy lipstick and think, "Yes, that's the one." Then you apply it, look in the mirror, and suddenly feel like you're headed to a goth wedding or auditioning for a vampire movie instead of, you know, just living your life.
Here's the truth: vampy lips aren't the problem. The drama that comes with them? That's usually just a technique issue. And we're about to fix that.
Bold, deep lip colors are powerful. They're confident. They make a statement without you having to say a word. But making them work for your Tuesday morning coffee run or that 2 PM Zoom call? That takes a little strategy. Lucky for you, our makeup gurus have perfected the art of the everyday vampy lip, and we're breaking it all down.
Why Vampy Lips Feel Like "Too Much"
Before we dive into the how, let's talk about the why. Deep lip colors often feel dramatic because of three common mistakes:
The application is messy. Dark colors show every imperfection, bleeding, uneven edges, patchy coverage. What looks forgivable on a nude shade looks like you applied your lipstick in a moving car with a dark berry.
The rest of your makeup is competing. Heavy eye makeup plus a bold lip can feel like costume territory. It's not that you can't do both, but for everyday wear, balance is your best friend.
You're choosing the wrong undertone. Not all vampy shades are created equal, and the wrong undertone can clash with your complexion, making the whole look feel "off."
The good news? All of these are fixable. Let's get into it.

Step 1: Prep Your Canvas (Yes, Really)
We always say this, and we'll keep saying it: prepped lips are non-negotiable when you're working with bold colors. Here's what you need to do:
Exfoliate. Use a gentle lip scrub or even a soft toothbrush to buff away any flakiness. Dark lipstick will cling to dry patches like nobody's business, and it won't be cute.
Moisturize, then blot. Apply a lightweight lip balm and let it sink in for a minute or two. Then, and this is important, blot away the excess with a tissue. You want hydrated lips, not slippery ones. Vampy shades need something to grip onto.
Create a neutral base. Here's a pro trick: lightly apply your foundation or concealer over your lips and blend it out with a beauty sponge or fingertip. This neutralizes your natural lip color and gives you a clean slate to work with. It also helps prevent the lipstick from bleeding into fine lines.
This whole process takes maybe three minutes, but it eliminates 90% of the issues people have with dark lipsticks.
Step 2: Line Like Your Life Depends On It
If there's one step you absolutely cannot skip, it's this one. A lip liner that matches your lipstick shade is your insurance policy against bleeding, feathering, and that dreaded "melting lipstick" look by noon.
Here's how to use it:
Outline your lips first. Start at your cupid's bow and work your way around, staying just inside your natural lip line. Don't overdraw, vampy shades are bold enough without adding extra surface area.
Fill in your entire lip. Yes, the whole thing. This creates a base layer that helps your lipstick adhere better and last longer. Plus, if your lipstick does wear off throughout the day, you've got a matching liner underneath instead of your natural lip color peeking through.
Sharpen for precision. A sharp lip liner gives you clean, defined edges. A dull one? That's how you end up with a fuzzy, imprecise line that makes your vampy lip look sloppy instead of chic.
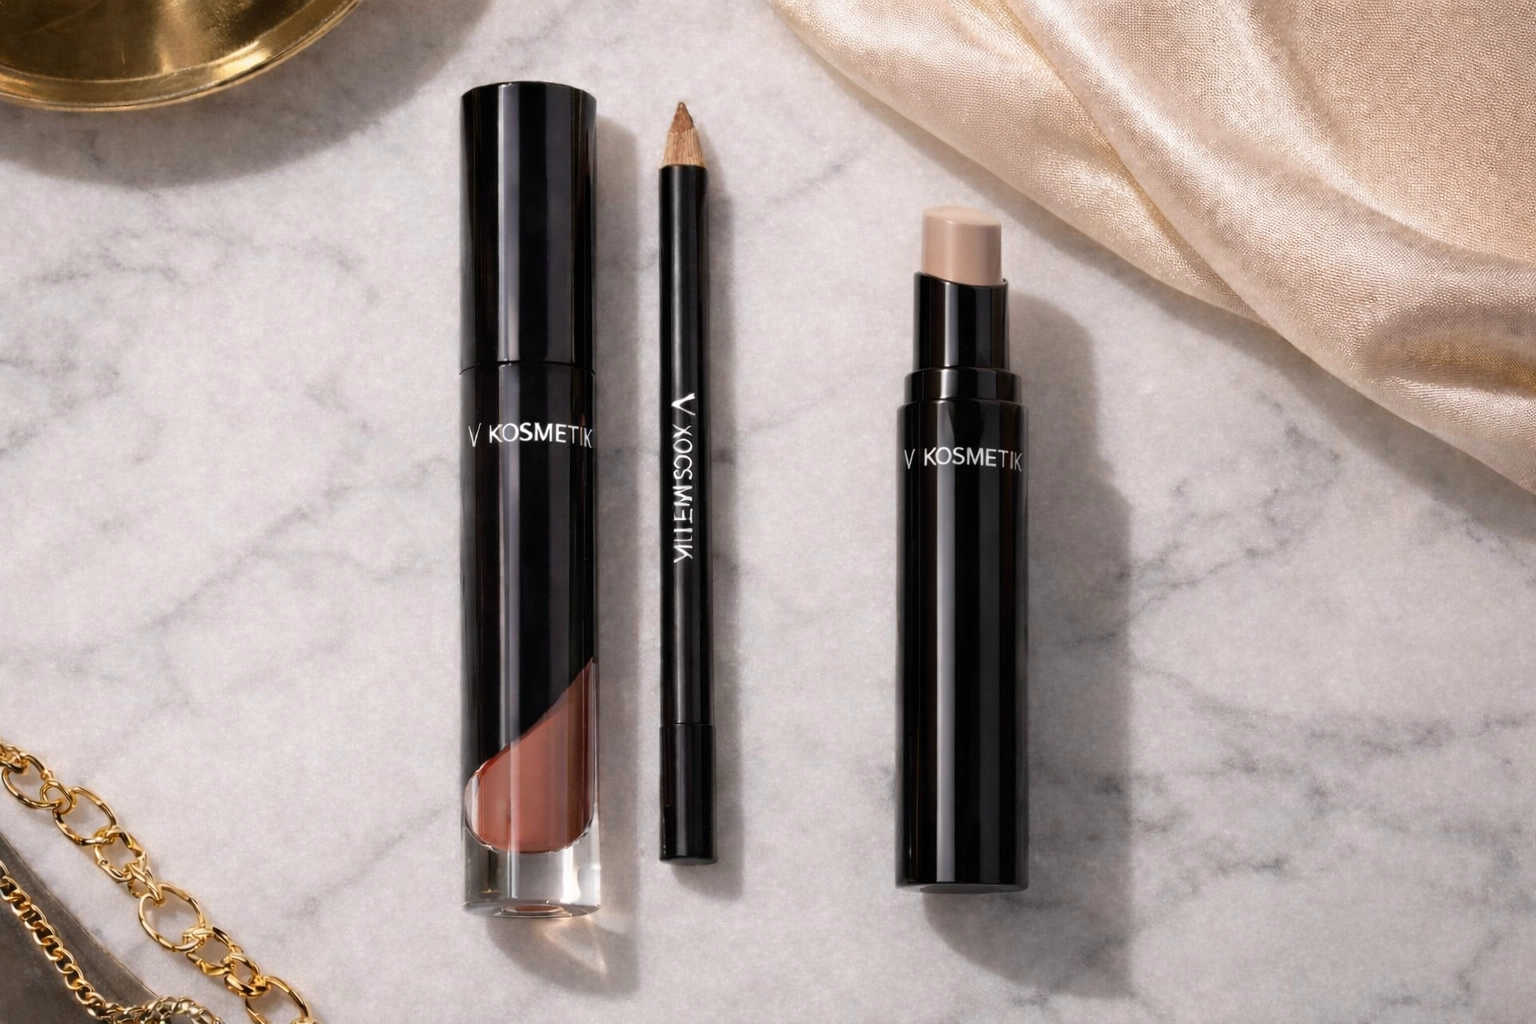
Our Duo Lip Liner is perfect for this: it's creamy enough to fill in comfortably but firm enough to give you that precise edge.
Step 3: Apply Your Lipstick Strategically
Now for the main event. Here's how to apply your vampy shade so it looks intentional, polished, and totally wearable:
First coat: Build your base. Apply your Creamy Liquid Lipstick directly from the applicator or with a lip brush. One even layer is all you need right now. Don't go overboard.
Blot and set. Press a tissue between your lips to remove any excess oils. If you want next-level staying power, dust a tiny bit of translucent powder over your lips using a fluffy brush. This locks everything in place.
Second coat: Perfect your look. Apply a second, thin layer using a lip brush for ultimate precision. This is where you clean up any uneven spots and build the intensity you want. The key word here is thin: you're refining, not re-doing.
Clean up the edges. Dip a small concealer brush or a cotton swab in concealer and trace around your lip line. This sharpens your edges and makes your vampy lip look professionally done.
Step 4: Choose Your Vampy Shade Wisely
Not all deep lip colors are going to work for everyday wear, and that's okay. Here's how to pick shades that feel bold but not costume-y:
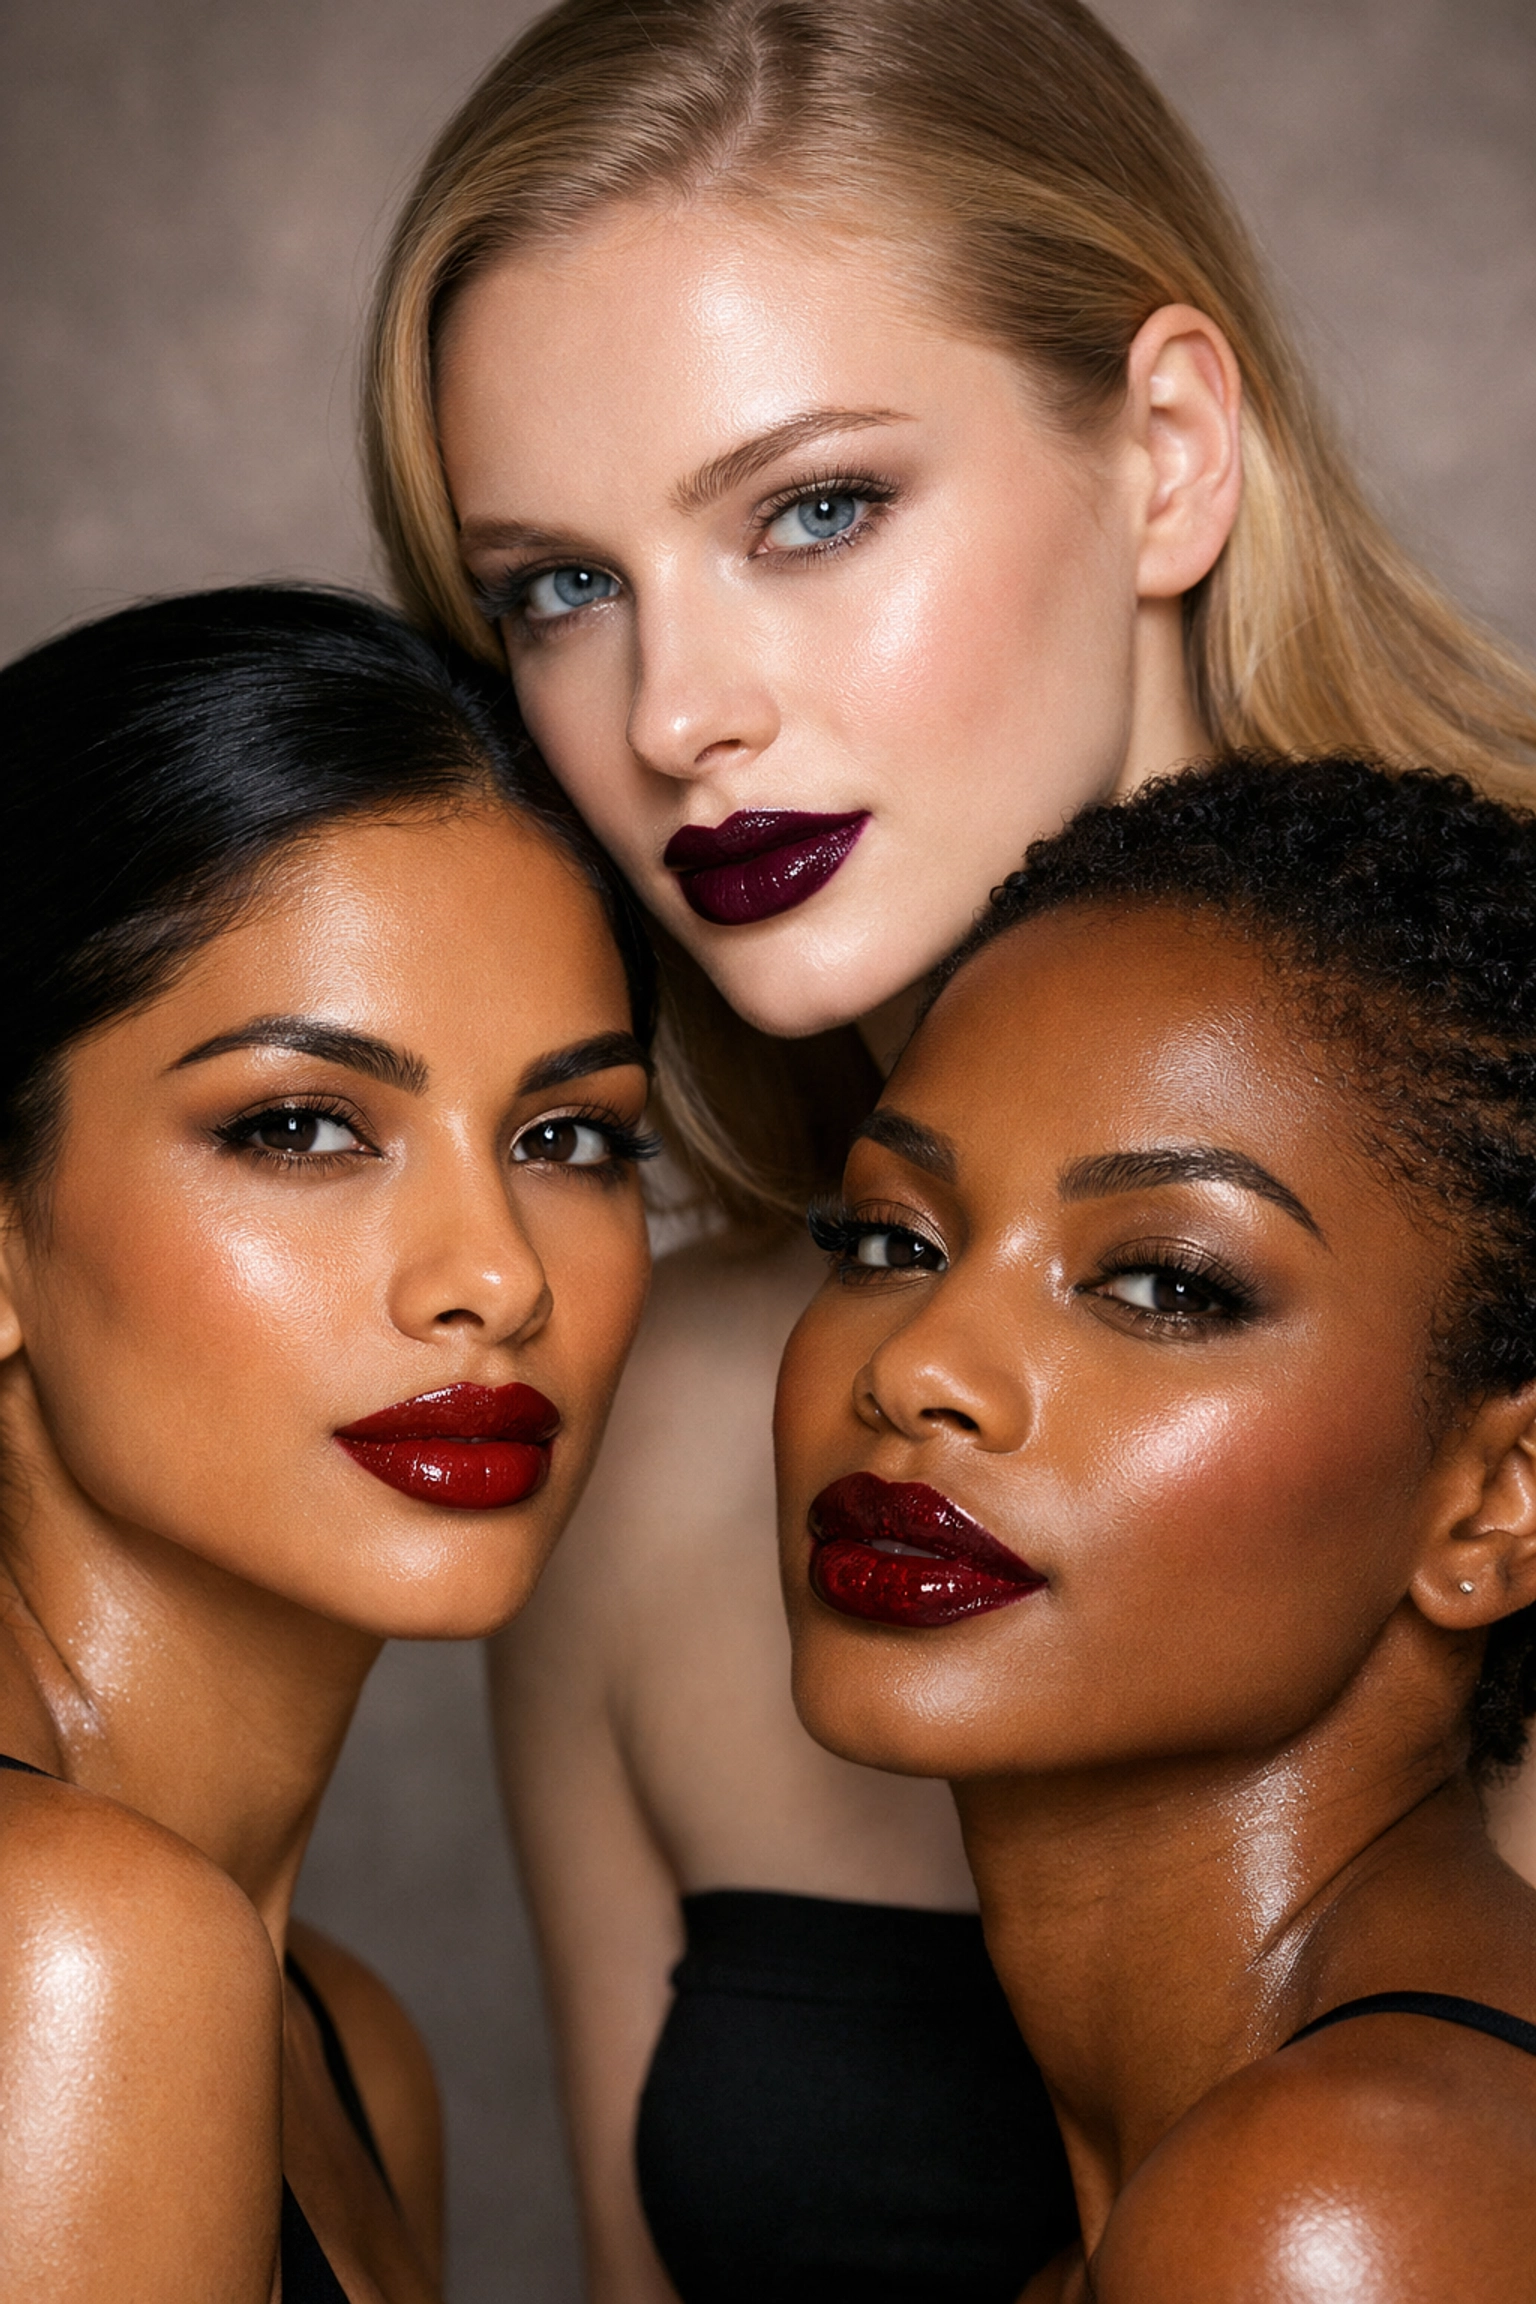
Consider your undertone. If you have cool undertones, reach for berry, plum, and blue-based wines. Warm undertones? Go for brick reds, chocolate browns, and warm burgundies. Neutral undertones can play with both.
Start lighter, go darker gradually. If you're new to vampy lips, don't jump straight to the blackest plum you can find. Start with a deep rose or mauve, then work your way up to those intense wines and berries as you get comfortable.
Think seasonally. Deep mauves and dusty roses work beautifully in spring and summer when paired with lighter makeup. Save your richest burgundies and chocolate browns for fall and winter. Red, though? That works year-round.
Mix and create custom shades. Here's a secret: you don't have to commit to one bold shade. Layer two colors: maybe a berry over a brown liner: to create a more unique, wearable tone that feels totally you.
Step 5: Balance Your Overall Look
This is where a lot of people go wrong. A vampy lip is your statement, so the rest of your makeup should support it, not compete with it.
Keep your eyes simple. A defined brow, some mascara, and maybe a soft wash of neutral shadow is all you need. If you want eyeliner, keep it subtle: a thin line along your upper lash line, not a dramatic wing.
Go easy on blush. A light, natural flush is perfect. Skip anything too bright or shimmery that's going to fight for attention with your lips.
Let your skin glow. A luminous, healthy complexion actually makes a bold lip look more wearable and modern. Use a foundation that evens out your skin without looking heavy, and add a subtle highlight to your cheekbones.
This balance is what transforms a vampy lip from "dramatic evening look" to "confident everyday statement."
Step 6: Own It and Maintain It
Here's the thing about wearing bold lips daily: confidence is half the battle. If you feel self-conscious, people will pick up on that. But if you wear your vampy lip like it's the most natural thing in the world? That's powerful.
Keep a tissue or blotting paper in your bag for quick touch-ups. Our liquid velvet formulas are designed for long wear, but eating and drinking will still require a little maintenance. Just reapply with your lip liner and a bit of your lipstick, and you're good to go.
And remember: bold lips are meant to be seen. Don't play small because you're worried about being "too much." You're not too much. You're exactly enough, and that vampy shade is just the exclamation point.
The Bottom Line
Vampy lips without the drama? Totally doable. It's all about prep, precision, and choosing shades that work with your natural coloring instead of against it. Master the liner, perfect your application technique, and keep the rest of your look balanced. That's it.
So go ahead: rock that deep plum on a Wednesday. Wear that burgundy to brunch. Make that chocolate brown your new signature. Bold lips aren't reserved for special occasions. They're for any day you want to feel like the most confident version of yourself.
And honestly? That should be every day.


